Author: Paul Locher

Painting For Contemporary Homes

Painting is a quick and inexpensive way to refresh an entire room. It can also add to a home’s resale value. Despite the many different paint colors available, choosing one that best suits your home’s style is important. The following tips can help you make the right decision.

painter

A popular choice for contemporary homes, Glidden’s Red Delicious is a vibrant yet soothing hue. This shade pairs well with white trim and doors.

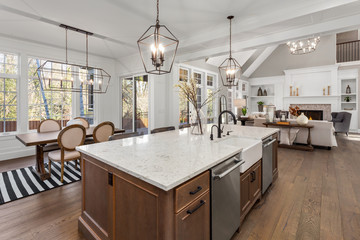
Warm neutrals are a go-to option whether you prefer traditional or contemporary styles. Beige, tan, and cream shades are easy on the eyes, create a sense of warmth and coziness, and work well with various furniture and accent colors. These neutrals are also great for balancing out cooler tones in your home.

To choose a warm, neutral shade, consider the color’s undertones. Shades with warm undertones (reds, yellows) advance toward the eye and appear more active, while cool tones (blues, greens, violets) recede from the eye and appear more calming.

Another way to tell if a paint color is warm or cool is by assessing its Light Reflectance Value (LRV). A warm tone will appear golden and glowy in natural light, while grayer shades look cooler under less direct sunlight.

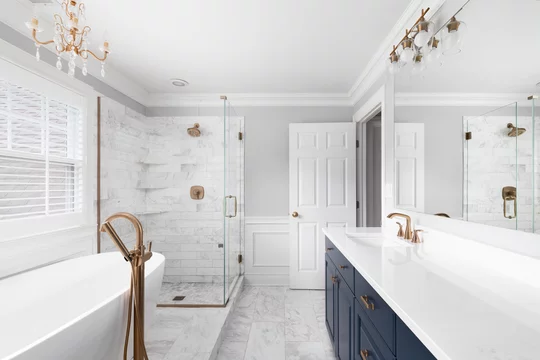
White is the classic go-to neutral, but it’s important to know that white paint shades have a wide range of undertones that affect their overall look. Shades with gold or golden-beige undertones like Ballet White and Sherwin Williams White Duck are warm neutrals, while Sherwin Williams Shoji White has a more cool undertone.

A greige is the perfect balance between gray and beige. Soft neutrals like Sherwin Williams Agreeable Gray and Sherwin Williams Silver Lake are popular greige paints. Sherwin Williams Yukon Sky is a lighter, cooler version of greige that works well in north-facing rooms with more blue light.

Try darker hues like Black Forest Green from Benjamin Moore’s Historic collection if you want to get a bit more adventurous with your greige. This rich, greenish-blue is a modern take on the traditional classic and can be balanced with cooler elements such as gray decor.

Even though the color black is technically neutral, it can still add interest to your room. Use this versatile color sparingly with your other neutrals to maintain a clean, polished look.

With their nod to precious gemstones, jewel-tone hues offer a rich, saturated option that can elevate a room. From a deep sapphire blue to a rich amethyst purple or citrine yellow, this regal color palette has the power to bring an instant sense of elegance and elevation.

Jewel tones can be intense for contemporary homes, but using them sparingly as accents or full wall colors can soften the look and make them feel more understated. To help balance out the high quotient of saturated hues, add a lot of neutrals in the form of window trim, area rugs, or cabinetry.

Incorporating texture into your jewel-toned palette can also help soften the overall feel of a space and keep it from feeling too overpowering or OTT. Choose fabrics like velvet or faux fur that offer a soft, luxurious touch to your jewel-toned paint colors.

While jewel-toned hues work well with various fabrics and textures, they pair wonderfully with metallics like gold and bronze. Add some shimmer to your space with jewel-toned strip lights (popularized through TikTok) or a shiny chandelier for a truly luxurious aesthetic.

As a bonus, many of the most popular jewel tones fall into the green and blue family of hues. These saturated shades work beautifully with various natural wood stains, neutrals, and other warm tones like brown and cream.

Whether you’re going for an earthy, teal vibe or something more vibrant, consider bringing in some greenery to compliment your jewel-toned walls. Adding just one solitary plant to your home can instantly boost the look of your room and help offset the richness of the color palette.

Choosing the right shade of jewel-toned paint is essential to creating the right look. Fortunately, ECOS Paints offers diverse expressive colors to suit any style and taste. If you want to incorporate jewel-toned hues into your contemporary home, try a sage green Sonoma Skies 737 or a bright turquoise Sonoma Waters 737 for an eye-catching accent wall.

Accent walls have long been a popular design trend, and they are a great way to introduce color into contemporary homes. Whether you want to highlight artwork or create a focal point with a bold color, an accent wall can do the trick. Choosing the right shade and ensuring your professional painter knows how to execute the project properly is important.

To start, consider which existing features could benefit from an accent wall. For example, a fireplace, brick wall, built-in bookshelves, and architectural nooks are good candidates. Ideally, you’ll also want the accent wall to be symmetrical, as this will reinforce its focal nature. Avoid choosing a wall already dominated by furnishings or other building materials, such as windows and frames.

When selecting the actual color for your accent wall, remember that lighter shades open up spaces, while darker colors are more likely to draw the eye and make a room feel cozier. Choose a shade that complements your home’s furnishings and decor for the best results.

Consider using a rich color for an exterior accent wall that will stand out in your neighborhood. Dark blues like Benjamin Moore’s Newburyport Blue are popular for modern exteriors and work well with contrasting shingle styles and natural wood textures. Gray paint is another option for an exterior accent wall. It works well with various siding materials, including natural wood and stucco.

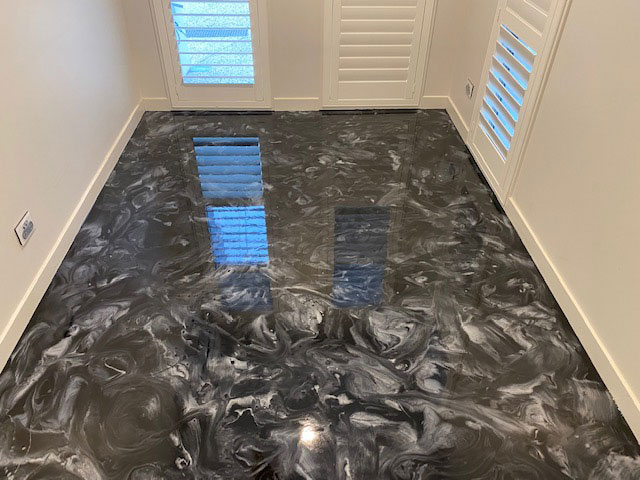
You can even go wild with your accent wall and opt for textured wallpaper or patterned paint. Use a high-quality, washable wallpaper that will withstand the elements and require less maintenance than a painted surface.

There are endless painting options for your contemporary home, and the possibilities are only limited by your imagination. The most important thing to remember is that your home should reflect your style and match your family’s needs. With the help of a professional, you can find the perfect color and texture to make your house come alive.

The contemporary home is about letting light in and accentuating sleek textures, but that doesn’t mean your modern interior can’t have a pop of color. Opt for neutral shades like beige, taupe, and gray in your living areas to create a comfortable space suitable for relaxing or entertaining. Then, add color to furniture, art, or other accents. For example, the bedroom is perfect for bold blues or greens that pair beautifully with patterned upholstered headboards, as shown here.

Color can also be a great accent to your contemporary exterior. If you’re looking for a color that will stand out without feeling too over-the-top, consider a shade of orange or yellow. For example, a terra cotta-like orange can warm a concrete-colored house and look fantastic with wooden features such as decking and railings. Or, try a deep sea blue or ocean aqua paint shade that pairs well with your wooden windows and doors.

In addition to incorporating some of these popular paint colors, don’t be afraid to think outside the box and go for something more experimental. For example, if you have a beautiful piece of wall art or other artwork that could better match your space, try painting a section of the room in a new color to see if it works better with your existing decor. This is an easy and affordable way to experiment with a new paint color without committing to a whole room.

If you’re ready to give your contemporary home a facelift, contact our team today for more information on how we can help. We’re happy to discuss your color ideas and recommend the best painting options for your unique space.

While traditional homes are rooted in a specific period, contemporary styles adapt to the current trends in design. Therefore, They are more likely to appeal to prospective buyers. For this reason, it’s a good idea to incorporate some elements of contemporary style into your home before you put it on the market.

How to Make a Plumbing Repair

Plumbing is an essential part of any home. It’s the means by which water moves through the house, and flushes waste away.

Plumbing

When something goes wrong with your plumbing, it can cause a big mess and a large bill. This is why it’s important to schedule regular plumbing maintenance. For professional help, contact Morristown Plumber.

A leaking pipe can be a serious problem, not only causing water damage in your home but also creating unhealthy conditions for mold and mildew. The best solution is to fix the leak quickly so that the water doesn’t cause further damage or make the situation worse.

Thankfully, there are many ways to stop a leak without having to replace the entire pipe. These DIY methods can be done with items you can find at your local hardware store and will save you money in the long run.

The first step in repairing a leak is to shut off the water supply and any faucets connected to the leaking pipe. This will allow you to dry the area and will help the pipes to dry more quickly.

Next, measure the circumference of the leaking pipe. This will give you the measurements you need to purchase the right repair supplies.

There are a number of different types of repair tape that can be used to fix a leaky pipe. They can be purchased at most hardware stores and can be applied to both metal and plastic pipes.

Fiberglass resin tape works well for temporary repairs intended to slow damage. It uses a water-activated resin that hardens around the pipe, allowing it to create a watertight seal. This method is ideal for small leaks that don’t need immediate attention or for leaks that are too large to be fixed by a DIY homeowner.

Epoxy putty is also an excellent option for repairing a leaky pipe. It comes in both putty and liquid (syringe) forms, which can be applied directly to the leaky pipe or fitting.

This is a very easy way to patch up a hole or crack in a PVC pipe. It’s important to read the instructions and take care to clean the pipe or fitting before applying the epoxy.

Another option is to use a rubber patch. There are a variety of rubber patch kits available for sale at most hardware stores that can be applied to a leaky pipe in minutes.

The key to this type of repair is to make sure the patch is large enough to cover the hole or crack and secure it in place with a hose clamp. This will ensure that the leak will stay sealed until you are able to call a professional plumber for a permanent fix.

Epoxy putty is a handy tool that plumbers use to fix leaking pipes, create watertight seals around faucets and drains, and repair cracked and chipped masonry and concrete. It consists of two compounds, a resin, and a hardener, that have a moldable soft consistency similar to clay.

It can be kneaded to form a solid, strong bond with almost any surface it is applied to. When cured, it can be painted, drilled, sawed, and sealed.

There are many types of epoxy putty, but they all have one thing in common: they are strong and can be used to fix a wide variety of household issues. Some are specifically designed for plumbing repairs, which can be bonded to damp surfaces and cured underwater.

Usually, it comes in a convenient stick format. You simply remove a small amount of the glue from the stick and knead it with your fingers until it is uniform in color. Then, you wrap it around the leak and press down on the edges to secure it.

The chemistry of the hardener determines how quickly it will work with certain materials, so you should choose the best epoxy putty for your needs. 

For larger projects or more intricate work, you may need to take a little longer to get the best results with epoxy putty. You can always choose a more powerful hardener, which will speed up the working time.

It’s important to sand and clean all surfaces you’ll be using the epoxy on before applying it. This will ensure you’re able to create a strong bond and prevent the epoxy from cracking or falling apart.

Some plumbers also use plumber’s putty, which is an old-fashioned gooey substance that is used to make watertight seals around taps and other plumbing parts. It is less messy than Teflon tape and can be used on many different materials, but it’s not as durable as epoxy.

Fiberglass wrap can be used to stop a leak in a pipe and can also be used as a temporary patch until a plumber can make a full repair. This is useful if the pipe is located in a difficult place or if you need to make a repair quickly.

This product is made from high-strength, inorganic glass fibers and bonded with a thermosetting resin. It is designed for use in the construction of ducts and provides thermal and acoustical insulation. 

For pipe repair, the product is typically poured into water and wrapped around the damaged area to create a patch. The tape is then cured and hardened. It can be applied over epoxy putty to give extra protection to the repair.

Ensure that the wrap is well-soaked and has been rubbed thoroughly with water as the product is being used. It is important to work with a pair of latex gloves as this will help to prevent skin irritation and reduce the risk of breathing in uncured material.

Once the product has been in contact with water for at least 1 minute, wrap it around the pipe with a small amount of overlap at each layer of wrapping to achieve maximum adhesion. Start at least 100mm before the affected area and continue to wrap the pipe in one direction until the entire roll of fiberglass repair tape is covered with at least four layers.

Repeat this process until the entire roll of fiberglass tape is complete, and then tape it off. Do not forget to pull slightly at each round of wrapping to ensure that the pipe is well secured.

After the wrap has been completed, spray water onto the pipe wrap and consistently spritz it with water to compress the bubbling resins that have risen to the surface of the product. Finally, wear a pair of latex gloves and continue to spritz the repaired pipe section with water as it is being cured for at least 4 hours (at an ambient temperature of 30degC).

A rubber patch is an easy and inexpensive way to repair a small leak in a PVC pipe. The rubber patches are available in a variety of sizes, shapes, and colors and can be applied directly to the leaking pipe or to the damaged area around the fittings.

The best use for a patch is to prevent a pipe from rupturing and causing water damage in your home. If you’re not comfortable working with the pipes and fittings in your home, then a professional plumber is your best bet for repairing these leaks.

To repair a leaking pipe using a rubber patch, first, determine the location of the leak. This will help you find the right size patch and a pair of hose clamps to attach it.

Using scissors, cut a 1-inch square of neoprene or rubber patch that is a little larger than the size of the hole or split. For large holes or fissures, you might need to purchase a sheet of rubber a little larger than the size of the pipe or a bicycle tube patch. Place the patch over the leaking section of the pipe, center it, and secure it with a pair of hose clamps or a repair clamp that has a rubber gasket on one end.

If a leaking pipe is located in a tight space, such as an attic or crawl space, then it may be difficult to pinpoint the source of the leak. A pressure test or specialized video camera can help you locate the leak and locate the pipe.

Once you’ve identified the leak, clean the area to be repaired and dry it thoroughly. Then, use a syringe-form epoxy patch material or a self-mixing repair epoxy to apply the patch to the damaged area.

Most syringe-form patching products are self-mixing, as the plunger on the tube is depressed by the user to mix the ingredients in the product. Others require a hand-mixing process to produce the putty-like repair material that’s used to cover the leaking area and seal it.

After applying the patch, wait about 15 to 20 minutes for it to harden. Once it has cured, turn on the water supply and check for leaks. If the leak persists, then you need to make a more permanent fix for the problem.

What You Should Learn About Bathroom Renovation

Bathroom renovation is a home improvement project that involves significant changes to a bathroom’s layout and appearance. These modifications include fixture replacement, rewiring, and plumbing.

Bathroom Remodeling

However, these changes can be significant and expensive. That’s why some homeowners wonder if they should remodel at all.

Whether you’re planning to remodel your bathroom or simply update its look, it is important to choose fixtures that are functional and stylish. The right fixtures can transform a bathroom into a luxurious space while also increasing the home’s value.

Modern bathrooms have a wide range of fixture options, from glass sinks to porcelain toilets. Some of the most popular choices include brushed nickel, bronze, and brass finishes.

These finishes are often a good choice for contemporary or industrial bathrooms and can help define the room’s overall style. However, be sure to choose a finish that is durable and easy to maintain.

There are also several new fixture innovations that can save energy and money, such as tankless water heaters, LED lighting, and low-flow faucets and showerheads. These products are a great way to make your bathroom more environmentally friendly while still maintaining the functionality and quality you want.

Before selecting your bathroom fixtures, consider the room’s layout, natural light source, and priorities. These factors can influence what type of fixtures are best suited for your bathroom and how much they should cost.

Once you have a list of the fixtures that are required, take measurements and create a budget that includes materials and labor. Then, visit a showroom and talk to the design team about your needs.

Another great resource for finding the perfect fixtures is a home improvement magazine. Many magazines have pictures of bathroom fixtures that are both stylish and functional, so you can get a feel for the options available.

Then, keep the images in a file to use when you go shopping for fixtures. This will allow you to remember the images when you’re in the store and make well-rounded decisions.

The bathroom is a room that requires frequent attention to detail and cleaning, so choosing fixtures that are easy to clean and maintain can be especially important. The right fixtures will last for years to come and keep your bathroom looking its best.

Whether you’re remodelling your current bathroom or starting from scratch, the layout of your new space can have an impact on how your bath looks and feels. Getting the right arrangement for your needs can be a challenge, but with some clever bathroom layout ideas, you can maximize your space and create a beautiful bathroom that suits your lifestyle.

One of the most important decisions in your bathroom remodel will be where to put your sink, toilet, and tub/shower. The placement of these key elements will help your space feel organized and livable.

For a more compact layout, consider placing the sink and toilet in the same room but with a door that leads to another room. This approach is great for people who want a bathroom that can accommodate more than one person at a time and can handle a guest shower when needed.

If you have a small space, consider using wall-hung units and fittings to free up floor space for other elements. These space-saving options can make your bathroom look more open and airy, particularly if you choose units with sleek or narrow legs.

Another smart layout option is to add a separate space for seating in the bathroom, particularly if you’re looking for master bathroom ideas or want to create an oasis in your space. This can be a great solution if you need an extra place to sit while you’re getting ready in the morning or after a long day at work.

It’s also a good idea to build a closet or linen storage area during the planning stages of your project. These spaces can be used to store towels, shampoo, conditioner, and other essentials.

When you’re designing your bathroom, don’t forget to think about how the layout of your fixtures will affect lighting. Having proper lighting will not only enhance the functionality of your space but also make it more appealing to potential buyers.

Once you’ve determined the best location for your bathroom fixtures, the next step is to decide on a design. Having a clear idea of what you’re looking for will make the design process much easier. It’ll also allow you to set a budget and hire contractors.

Water Damage Restoration – How to Minimize the Impact

Whether you’ve had a water intrusion in your home or office, there are a number of steps you can take to help minimize the impact on your property. These steps include identifying the cause of the intrusion, sanitizing and drying affected areas, and repairing the damage.

Water Damage Restoration

Drying out affected areas to prevent mold growth. During water damage restoration, it is important to dry out affected areas to prevent mold growth. Aside from reducing the chance of mold contamination, this also prevents rot and other problems. There are several ways to do this. You can use a dehumidifier to reduce moisture and run fans to help speed evaporation.

You can also use bleach or detergent to clean wet surfaces. Let the solution sit for at least 10 minutes before rinsing it. If you can, open windows or doors to remove the excess moisture. Mold spores love moisture. They are easily transported through the air, so you should wear protective clothing if you clean them with a bleach solution. You should also wear boots and long pants. You should also wear safety glasses. If you can, wear a N-95 respirator. It is also a good idea to keep an eye on the exterior of your house for signs of mold.

Sanitizing affected areas. During water damage restoration, sanitizing the affected area is a good idea. This can be done by using commercial non toxic products. Using a dehumidifier to keep the air moving is also a good idea. Using the right products for the job is the key to a successful cleanup. This can be important for your family’s health. Luckily, many products are designed to help you return to normal quickly. For example, many commercial non toxic products can remove mold and bacteria from your home. These products are made from natural substances, such as vinegar, which are known to kill bacteria.

Flooding experts can provide all the information you need to get your home back to normal as quickly as possible. Their technicians are experts in water damage restoration. They will also provide you with a free no, obligation estimate.

Identifying the cause of the water intrusion. Identifying the cause of the water intrusion is crucial for the success of water damage restoration. It may be due to a compromised foundation, plumbing leak, or damage caused by a flood. These problems can cause structural damage to your home and health issues to those living in the building. Water intrusion can be very costly. It can damage flooring, walls, and ceilings. It can also lead to mold growth. Mold can have a negative impact on the health of those living in the home.

Identifying the cause of the water intrusion can help you minimize the damage and costs associated with it. Using a moisture meter can help you identify where the moisture is coming from. Moisture meters can be placed on carpets and wall-to-wall carpeting to test for moisture. Moisture meters can also be used to check for leaks in the roof. If the roof leaks, it can cause significant damage to the structure of the building. The leak can also lead to mold growth, which can cause respiratory problems.

Cost of water damage restoration. Getting your house restored after water damage can be a costly process. There are a number of factors that determine how much you’ll pay. This includes the size of the room, type of damage, and the amount of work needed. The type of water that has damaged your home can be the most important factor in determining how much you’ll pay. If the water has caused permanent damage to expensive building materials, you’ll end up paying more.

If the water is clean, the cost of restoration will be less. This is because cleaning it is easier. It will also be cheaper to dry than if it has been heavily damaged. The type of materials that are affected by water will also affect the cost. Generally, materials that do not absorb moisture are more susceptible to water damage. Materials such as hardwood floors and brick can be severely damaged. Water damage can also cause problems with your appliances. It can rust, damage your pipes, and cause mold. Mold spores can begin to grow rapidly in 24 to 48 hours. This means that you need to get mold removal services immediately.

The Basics of Plumbing

The plumbing system in your home plays a major role in your house’s well-being. Understanding the basics can help you better care for your home and identify issues before they become big problems. You don’t have to be a professional plumber to understand the basics. There are over 120,000 plumbing companies in the States that can service your home’s plumbing system.

Plumbing

Plumbing systems consist of two main parts: the water supply and the drainage system. These parts are kept separate for health reasons. The water supply system is comprised of pipes that bring clean water into your house, while the drainage system removes dirty water through air pressure and gravity. The two systems meet at fixtures, where you use water in your home.

Even if you don’t plan on using the water in your home, knowing how to locate the water shut-off valve can save you money and prevent expensive damage. Plumbing is an intricate system that can easily become damaged, so knowing where it is can save you a lot of money. Listed below are some of the basic plumbing skills you should learn to keep your home safe.

A stop cock is a primary switch that turns off the water coming into your house. This is a device that prevents the overflow of indirect system tanks. Indirect systems contain electric elements to heat the water. To maintain the temperature of the water in indirect system tanks, an overflow pipe is placed to prevent overflow.

There are several different components of a plumbing system. These parts are used to provide water to the home and may be made from different materials. For example, a toilet will require a drain to discharge its waste, while a water heater will need a pipe to supply hot water to the household. These pipes can be made from copper, brass, PVC, or lead. They carry water throughout the home and need to be cleaned periodically, or they will break. Plumbing systems also include water softeners, water conditioners, and drainage systems.

In addition to water supply pipes, a plumbing system will also include fixtures and faucets. It will also have drainage and vent pipes to safely dispose of wastewater. Plumbing fixtures will provide adequate water flow and eliminate water-borne contaminants. A well-designed plumbing system is safe and reliable. It will minimize the risk of malfunction or leakage.

Plumbing pipes are of different sizes and are measured by their inside diameter and outside diameter. The inside diameter is the size of the hole in the pipe, while the outside diameter is the distance from one side of the pipe to the other. Plumbing fixtures, such as toilets and showers, use water in the plumbing system. The plumbing system also includes valves to regulate the flow of water and maintain the correct pressure.

Plumbing is made of two main subsystems: the freshwater subsystem and the waste-water subsystem. The water entering the home is under pressure so that it can travel up and around corners.

There are several steps involved in installing a plumbing system. The first is obtaining the required permits. These will allow you to install a plumbing system that complies with code and prevents future problems. You should get a rough-in plumbing diagram for your proposed plumbing system to save time and money later.

Installing a plumbing system is an important part of any new home. A well-functioning system is essential not only for its aesthetic value but also for the functionality of your home. Proper installation can prevent major problems and damage to your household contents and building structure. To learn more about the various steps involved in a plumbing system installation, read on.

The next step is to determine what types and sizes of pipes are necessary. The type and size of pipes will depend on your local plumbing code. The most common materials used for pipes are cast iron and brass, but you can also use copper, PVC, and even cross-linked polyethylene (PEX) piping. After determining which type of pipes are needed, you can start the construction phase.

During the rough-in phase, you will set in the primary lines. These lines must not be connected to anything yet but should be set before hanging drywall. The main drains should be set in line with the stack, a vertical pipe, and a drain pipe.

Your plumbing system will also require venting. This will allow waste water to drain smoothly while also venting methane gas. The pipes should have a pipe through the roof to vent outdoors. Additionally, each plumbing fixture needs a trap to prevent sewer gas from entering the living space. Make sure you read the local plumbing codes to determine where to install the cleanouts.

The Benefits of Heating Maintenance

A professional heating maintenance service can save money by ensuring your heater operates safely and efficiently. Regular preventive maintenance is a must-do for your heater and is the best way to ensure it stays in good condition for many years. During an annual maintenance service, the technician will check your system for any problems and repair them before they become major issues. This can cut your repair costs by more than 50% and save you thousands of dollars over the life of your system.

HVAC Services

Regular heating maintenance service will ensure your furnace operates at peak efficiency. This will prevent the possibility of hot spots and increase the comfort of your home. HVAC will ensure your furnace runs at peak efficiency to keep you comfortable throughout the coldest months. This means you can enjoy the cold months and get more out of winter. With honest service, you can rest assured that your heating system will be in good shape for many years.

As part of regular maintenance, you should change your HVAC system’s air filters regularly. Clogged filters can reduce airflow, which can lead to a host of problems. As a general rule, change your air filters every one to three months. Also, make sure the filter is clean and dry. Any debris or lint that gets into the air filters can affect the performance of your heating system, so it’s important to change them regularly.

Performing regular heating maintenance can provide many benefits, including peace of mind and a guarantee that your heater will last through winter. As a result, it’s best to start this task early in the fall so your home is ready for cold fronts. You can also ask your heating maintenance professional to perform preventive maintenance on your heating system if necessary. It’s best to consult a professional if you’re unsure what needs to be done.

Maintaining your heating system regularly is a smart move for years of trouble-free service. Not only will regular maintenance keep your heater running efficiently, but it will also improve your heating bill. Heating systems lose their efficiency each year, but annual maintenance can help restore the efficiency of your system. You’ll save money on energy bills and maintain consistent comfort by keeping your heating system running well. It’s worth it! If you have any questions, contact your local heating maintenance service.

Changing the furnace’s filter is important to keep it running efficiently. A $1 fiberglass filter can help protect the blower motor and the burner. Be careful when choosing high-efficiency filters because they restrict airflow and make your furnace less efficient. For cleaner air, consider installing a separate air-cleaning system. Another simple way to keep your furnace running safely is to blow the dust off the pilot. Dust on the pilot may lead to a false flame sensor, which may be dangerous.

Performing a combustion test is another important task for a professional HVAC technician. You’ll need a manometer and combustion analyzer to run the test. You’ll also need a flathead screwdriver and an Allen wrench. Some professionals publish HVAC resources through the Air Conditioning Contractors. These resources are free for members, but you may need to use their subscription portal to access them. 

Proper heating maintenance also extends the life of your furnace and air conditioner. By paying attention to routine maintenance, you’ll extend the lifespan of your furnace and prevent a 15% annual reduction in efficiency. A skilled HVAC technician will ensure all heating system components are functioning properly and are free from leaks and rust. A regular fuel tank inspection is another important part of maintaining your heating system and keeping your property safe. Don’t hesitate to call your local HVAC company if you have any questions or concerns.

Regular HVAC tune-ups are another essential part of HVAC maintenance. Even if you’re not currently using your heating system, it’s a good idea to schedule it every three to six months. Not only will this keep your system working efficiently, but it will also help you save money on heating and cooling costs. A good tune-up will ensure a long and comfortable season for you and your family. An HVAC tune-up is vital to ensure that your system is performing optimally.

How to Find a Reputable Flooring Contractor

If you’re looking to install new flooring, there are several factors you need to consider before hiring a Flooring Contractor. First, make sure the company has all the proper licensing and insurance. If possible, choose a local installer based in your area. In addition, check for a physical business address. You should also avoid contractors who ask for large cash deposits, as they may disappear with your money. Lastly, you should compare the cost estimates of several companies before signing a contract.

flooring contractor

Government contracting opportunities are available to flooring contractors in several forms. Federal contracts, for example, require a significant amount of information to be included in the contract. The government typically takes 30 to 120 days to review a flooring contract application, so having all of your ducks in a row is essential. Government agencies post all flooring contracts on SAM, which is the central point of information for all disciplines. However, obtaining a government contract requires you to be registered and meet certain requirements.

In addition to training in proper safety procedures, the Flooring Contractor should be skilled at installing a variety of different types of flooring. He should be able to use hand tools and equipment that are specific to each type of flooring. He should also have good communication and organizational skills. A good flooring contractor should be able to plan and lay out a project before starting work. The job description of a flooring contractor may vary depending on the location and type of project, but in general, the contractor should be knowledgeable of different types of flooring and be familiar with all of them.

Finding a good Flooring Contractor is not difficult. You can start by asking people you know who have experienced home renovation projects before. They will have an extensive network of contacts in the area. You can also ask your local hardware store for a list of contractors in your area. If the contractor you’re considering works in your neighborhood, they’ll be close to your home and more likely to be available. You can also research online reviews of local contractors, so you can get a good feel for whether a company is reliable or not.

If you live in the district, it’s best to find a flooring contractor who has many positive reviews. This will ensure that your flooring project goes smoothly and that you are happy with the results. If you’re not certain about the quality of the job, you can look at a flooring contractor’s portfolio to find out whether the service you are considering is worth the money and effort. If the price seems too high, consider working with a company that has a track record of success.

If you’re still not sure of the quality of flooring installers, consider checking with the Business Bureau. These sites feature trusted flooring installers, and these sites will help you filter out the bad ones. A survey revealed that 63 percent of homeowners are the most confident in comparing multiple project quotes, so make sure to look for a reliable company that meets these basic standards. You can also check if the contractor is insured, licensed, and certified, as failing to meet these basic standards may void your warranty.

Another aspect of a flooring contractor’s job is their ability to install different types of flooring. They install different types of floor covering, including hardwood, tile, and carpeting. Depending on the building’s design and style, these professionals may work with specialty products. Depending on the building, these products can be intricate and beautiful. They may also specialize in one type of flooring or work with a variety of products. The flooring in an office building, for example, could be very ornate.

How to Get Started on Your Kitchen Remodeling Project

While some people spend hundreds of thousands of dollars on kitchen renovations, many choose to make smaller, cheaper changes. While this can be a good way to get a brand new look, major changes may better suit a budget-conscious homeowner. For instance, installing new energy-efficient appliances is a great way to save money while giving your kitchen a unique look. Custom cabinets can also add storage space and increase the value of your property.

Home Renovation

If possible, decide early on whether you want to work with a general contractor or a designer (or both). They can help you get better deals on materials and other purchases throughout the remodeling process. If they are involved from the start, they can help you decide which ideas are feasible and which are not.

Before starting your kitchen remodeling project, you’ll need to know the first steps. The first step is to tear out the old materials and eliminate any hidden pipes. This step is a major undertaking for most homeowners, but hiring a licensed contractor can help ensure that the process goes smoothly. You can then plan your activities and budget around your new kitchen. The kitchen is the heart of the home, so don’t skimp on this part of the project.

When you have decided what kind of kitchen remodeling you want, the next step is to select a professional. While hiring a professional can save you money, the process can take months to complete. It would be best to consider how much money you’re willing to spend and whether the results will be worth the cost. Consider the layout of your current kitchen before you choose a remodeling company. If you’re remodeling your entire kitchen, you might as well get an expert’s opinion, and the project will turn out as you hoped it would.

Before hiring a contractor, you should draw up a contract. The contract should outline the project’s scope, set a payment schedule, and establish any special requirements you might have. Typical payment plans are:

  • 10 percent upfront.
  • Twenty-five percent during the three stages of the project.
  • The remaining 15 percent at the end.

If you’re unsure of the details of the contract, you can ask your prospective contractor any questions you have. When you’re ready for demo day, ensure you’ve brought along the necessary kitchen appliances and essential items for a temporary kitchen.

The key to successful kitchen remodels is to set a budget and stick to it. Custom cabinets, quartz counters, spacious islands, and other upgrades quickly add up. While hiring a contractor for a kitchen remodeling project is a great idea, setting a budget before you begin the project is essential. Keeping a tight budget will make the process more accessible, cheaper, and stress-free.

Regarding costs, keep in mind that kitchen remodeling costs vary widely by region. For example, in the south, a significant kitchen renovation with midrange materials and labor could cost as little as $56,673 compared to $77,460. This is due to cheaper labor costs and average income levels being lower. Before hiring a contractor, make sure you have a precise plan drawing. Then, compare the prices at store to find the best deal on the items you need.

Ultimately, a kitchen remodel can increase the value of your home. High-end finishes like marble countertops and stainless steel appliances are trendy and can increase your home’s value. Adding a kitchen to your home can make it stand out in a crowd and sell for more money. However, a higher home value doesn’t mean you’ll recoup all of your investment. If you’re planning to sell your house, keep these steps in mind.

When it comes to kitchen remodeling, final touches are critical. They are crucial and can help you avoid common mistakes. If you’re working with a GC, you’ll need to take measurements. Let them know if there’s anything you’re not happy with. Various official inspectors will review the completed kitchen and stamp the permit application as complete. They will arrange for all the inspectors, while a DIYer will have to get them independently.

Painting or refinishing cabinets will give your kitchen a fresh new look. Refinishing or painting cabinets will save you money compared to replacing them. You can also install a backsplash to tie together the colors of the kitchen. This flooring can quickly be done yourself for a few hundred dollars and won’t break the bank. Another cheaper option is upgrading your hardware. This will give your kitchen an airy look. In the end, a kitchen can increase the value of your home.