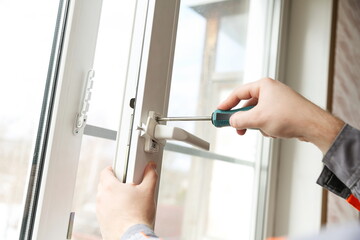
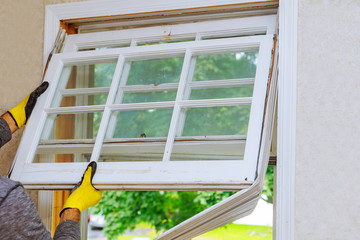
Hardwood Floor Refinishing

Hardwood Floor Refinishing can create a clean, inviting look for your home. Having your floors refinished can also save you money in the long run.

Hardwood Floor Refinishing

There is a certain pride that comes with completing a wood floor refinishing project yourself. It takes dedication and time, but the finished product is something that homeowners can be proud of.

Hardwood floor refinishing involves stripping down the old finish, sanding, and applying fresh stain to create an entirely new look. A good do-it-yourself project, the process of refinishing is fairly straightforward with the right tools and some patience. But it can also be messy and dangerous, so make sure you take the proper precautions. Tape masking tape to doors and windows to prevent dust from escaping during the process, and consider covering furniture or rugs with plastic sheets or drop cloths. Before you start, check that your sander and equipment are in good working condition. You should also decide whether you want to use water-based or oil-based polyurethane. Water-based finishes remain clear, whereas oil-based ones can yellow with time.

If you’re using a drum sander, work your way around the room, starting in the center and moving outward, taking care to sand under radiators and in corners. If there are dents or gouges in the floors, fill them with wood putty and sand until smooth. You should also sand the edges of the room with an edger, using coarser-grit sandpaper.

Whether you’re staining or just sealing the hardwood, test your color by applying a small amount of diluted stain to a hidden area. If the stain looks even and doesn’t leave a residue when scraped, you can begin the final step of refinishing.

If your floors are stained, wait at least 24 hours before walking on them; you should ideally wait for 4–7 days to allow the finish to fully cure. You should also keep pets away from the work area and open all windows to reduce the odor of the polyurethane.

Some refinishers offer “dustless” flooring, but this isn’t actually completely true. The refinishing process still produces a lot of dust, so it’s best to plan ahead. Leaving your home for the day or weekend will help reduce the amount of fumes you’ll inhale, and you can take a vaporizer with you to make the odors less strong. And if you have sensitive family members or pets, it’s a good idea to find a place for them to stay.

Sanding

When refinishing hardwood floors, the first step is to sand the surface. This is the most thorough method of refinishing and the most costly, but it removes scratches, dents, and stains from the floor, leaving it looking brand new. Before starting sanding, it is important to clear the room completely. This means removing all furniture, wall hangings, and window treatments. It is also a good idea to clear out closets if the wood flooring extends into these areas. Then, cover any fixtures or appliances with plastic tarps to protect them from sawdust. It is also a good idea to tape over electrical outlets and any cracks where dust may sneak in.

Then, sweep the surface of the floor thoroughly and vacuum it to get rid of any dust particles. A slightly damp mop with a microfiber or cloth rag is also helpful to remove any dirt that could mar the finish. After sanding, it is also a good idea to inspect the floor for any damaged or loose boards and secure them. This will make the finished product look much better, and it is an easy way to increase your home’s value when selling it.

After the sanding is complete, it is a good idea to use wood filler on any nail holes or gouges in the floor. This can be purchased at any hardware store and is usually color-matched to the existing floor. Another option is to use some of the sawdust from the sanding process and mix it with white glue to create a paste that can be applied with a putty knife.

Some people opt to use a vacuum-equipped “dustless” sanding machine when refinishing their hardwood floors, but this does not eliminate all the dust; it just reduces it. If you have a dustless sanding machine, it is still necessary to clean the entire floor thoroughly and wipe it down with a damp rag. It is also a good idea to switch the sandpaper on the sanding machine regularly to avoid putting too much pressure on one area of the floor.

Staining

When the sanding process is complete (which can take 2-3 days for a typical room), it’s time to stain the floors. This is the single most important step in hardwood floor refinishing, and it will determine how well your floors look when they’re finished. To help ensure that you get the right color and finish, it’s a good idea to talk with your flooring experts about what you want and ask them to bring samples of various stains for you to test on your floors.

Staining is a messy and labor-intensive process, but it’s also an excellent way to add a custom look to your home. When the stain is dry, it’s time to protect your new floors with a polyurethane sealant. This can be done with a high-density foam roller or, in some areas where you have less space to work, a two-inch brush.

Once the sealer is dry, it’s a good idea to vacuum and wipe the floors down with mineral spirits to remove any residual dust that could interfere with the adhesion of your new finish. Then, you can apply a second coat of polyurethane using the same technique as the first.

Refinishing your wood floors is a great way to improve the look of your home and increase its value. If your wood floors are damaged, however, resurfacing may be a better option than refinishing. Both options have benefits and drawbacks, so consider all your options carefully before making a decision.

Although refinishing is more expensive than resurfacing, it can make your wood floors look like new again. It’s also a great choice for older homes that have seen a lot of wear and tear. In addition to enhancing the beauty of your home, refinishing can also reduce the amount of maintenance required for your hardwood floors. A refinished wood floor is more durable than one that has been resurfaced, and it will last longer. However, refinishing can be tricky and requires professional experience. It’s best to hire a flooring expert who is NWFA certified and has years of experience working on wood floors. They understand the ins and outs of refinishing and can produce results that you’ll be proud to show off to your friends and family.

Varnish

The refinishing process involves the application of various coats of finish to a hardwood floor. A good-quality finish protects the hardwood from moisture, heat, and UV rays. It also adds to the aesthetic value of a room. Generally, three or more coats of finish are applied to the wood during refinishing. Before applying any kind of finish, it’s best to thoroughly clean the floor. This should be done by vacuuming and using a microfiber or tack cloth to remove any dust left behind. It’s important to let the floor dry completely before adding furniture.

The most common type of finish for hardwood floors is polyurethane. This type of finish is durable and easy to use. It comes in a variety of sheens, so you can choose the one that’s right for your home. When choosing polyurethane, make sure it’s water-based and has a low odor. Oil-based polyurethanes have a stronger scent and are more toxic than water-based versions.

You can also choose to varnish your hardwood floors. Varnish is a liquid coating material that dries to a hard, transparent film. It is typically made of a mixture of resin, drying oil, a drier, and a volatile solvent. When the solvent evaporates, the varnish oxidizes or polymerizes to form a tough protective coating for wood surfaces. It can be used on wood floors, furniture, and painting.

If you’re refinishing your hardwood floors yourself, it’s essential to wear the proper safety gear and have enough space to work. You’ll also need a drum sander, a vacuum with a HEPA filter, and cleaning products. It’s also a good idea to take your time so you don’t ruin the floor.

Before you apply a new coat of finish, you should stir it to make sure all of the ingredients are well mixed. This will help prevent air pockets from forming in the finish, which can lead to brittleness and other problems.

Cupping is another problem that can affect hardwood floors. This occurs when the planks start to cave in down the middle. This is usually a sign of water damage, and it’s best to catch it early. Refinishing the hardwood floor will smooth out the planks and prevent future cupping.

Signs That Your Backflow Prevention System May Be Faulty

Backflow prevention devices have a number of moving parts that can wear out with use. This is why they are required by law to be tested and repaired annually.

backflow repair

When an assembly fails a field test, the repair technician must examine and evaluate all the data generated. They also need to ensure that they are not creating a backsiphonage condition when depressurizing the assembly for inspection. For professional help, call On Point Plumbing & Heating. 

When your water turns brown or murky, it’s not necessarily a sign that the water is unsafe to drink. Typically, it’s just the result of sediment that’s settling in your pipes, and while the taste and color might be unpleasant, it won’t hurt you.

However, if you notice your water changing to a yellowish or white color or if you’re experiencing other issues with the quality of your tap water, it could be an indicator that your backflow device needs repair. In fact, the backflow preventer is a vital safety measure that protects your drinking water from contaminants like pesticides, fertilizer, chemicals, and soap. Backflow prevention devices also keep nonpotable water from entering your potable water supply. This includes water from home sprinkler systems, hair salons, car washes, and restaurants.

Most backflow preventers are made of a combination of metals (like stainless steel and cast iron), plastics, bronze, or even concrete. They are designed to be durable, but they will still suffer wear and tear over time. All backflow preventers will eventually need to be repaired or replaced.

Thankfully, a backflow repair technician can diagnose and fix the problem quickly. It’s important to have all the proper tools on hand and a clean workspace ready for the repair. The first step will be to shut off the downstream and inlet shut-off valves. Once the water is turned off, it’s crucial to open all test cocks so that all pressure is relieved and the assembly can be disassembled.

The body of the backflow preventer can be cleaned with a solvent, depending on the type and manufacturer. Some backflow assemblies, especially the larger 10″ units, are coated in a protective material to minimize scale growth and corrosion. Once the cleaning is done, it’s important to reassemble the backflow preventer and retest the system to make sure it is functioning properly.

Backflow prevention assemblies have internal springs, seals, and test cocks that can break down with normal wear and tear. If the backflow preventer isn’t in working order, it can allow pesticides, chemicals, fertilizer, dirt, soap, and more to get into your public water supply. A backflow professional can help you determine if the backflow preventer in your area has stopped working, and they’ll be able to fix it before it’s too late.

Foul Smell

The backflow of water into your house’s plumbing is a serious problem that could lead to the contamination of your household’s drinking and working water. It can happen for a number of reasons, including a drop in water pressure or the failure of a backflow preventer. These issues need to be addressed right away, or you could find yourself with contaminated water and a whole host of health problems. Luckily, you can avoid backflow contamination by paying attention to the following signs that your home’s plumbing system may be faulty:

A foul smell from your faucet can be a clear sign that your backflow device is not functioning properly. This is because contaminated water has a sulfur smell that builds up in your pipes and is released when you turn on the tap. This rotten-like smell can cause a variety of unpleasant symptoms, from stomach aches to diarrhea and even cholera. It is essential to call a backflow specialist as soon as you notice this problem, as it could mean that your water supply is seriously contaminated and needs urgent repair.

Another clear sign that your backflow device is faulty is water discoloration. Clean water has a transparent color, but contaminated water will be pink, yellow, or brown in appearance. This is because the contaminated water has been pushed backwards into your city’s water supply and may have been mixed with chemicals or human waste, which can contaminate the drinking water. Backflow prevention devices are designed to prevent the reverse flow of contaminated water into your city’s water supply, so any backflow problems are a serious issue that must be addressed as soon as possible.

If you notice any of these issues with your water, it’s important to contact a backflow specialist as soon as possible to inspect your plumbing system and fix any issues that might be causing them. These professionals are trained to recognize backflow and will be able to install the appropriate backflow prevention device on your property. They can also advise you on routine maintenance to help keep your plumbing system in good working condition.

Low water pressure

If you notice that the water pressure around your house has dropped, it could be a sign of backflow. This happens when a vacuum is created in your plumbing lines, leading to a decrease in water pressure throughout the house.

A loss in water pressure is usually the result of clogged pipes or a faulty backflow preventer valve. A professional plumber will be able to determine the problem and conduct a backflow repair if needed.

Backflow occurs when water flows in the opposite direction from its intended path through the piping system. The reverse flow of water can contaminate the clean drinking water supply and pose health risks to the entire household. This is why it’s important to know the signs of a backflow problem and take immediate action when you notice any of them.

One of the most common signs of a backflow problem is a foul smell or strange taste in your water. This is a surefire sign that your backflow device has failed and has allowed contaminated water to enter your home’s plumbing system. Drinking contaminated water can cause serious illness and even death.

Another sign of a backflow issue is a change in the color of your water. Clean water has a clear and transparent color, so any colored water in your home’s plumbing is a cause for concern. Changing colors in your water are often the result of backflow, as dirty water can carry sediment and rust particles into your home’s plumbing.

Water changes in color and taste can also indicate the need for a backflow preventer inspection and repair. This is because the water can become contaminated with toxins, such as fertilizer and soap, that have been introduced into the home’s plumbing system through the backflow device.

A backflow prevention specialist can identify problems with your home’s backflow device by inspecting the plumbing layout, individual pipes, and connections. They will also check the backflow device for early signs of wear and tear and perform routine maintenance tasks, such as valve cleaning, to help extend its life and ensure it continues to work correctly.

Frequent water leaks

When backflow occurs, your clean water supply can become contaminated with wastewater and other substances. This can be a health issue if the contaminated water is consumed, as well as an environmental hazard for your property. It can also corrode plumbing pipes, leading to leaks.

If you notice frequent leaks in your home, it may be a sign that the backflow device needs to be repaired. This could be due to a number of reasons, including dirt buildup or thermal expansion. Regardless of the cause, a backflow repair is needed as soon as possible to avoid costly repairs and water damage.

Another sign that you need to have your backflow preventer repaired is if there is a noticeable change in the taste and color of your water. This can be caused by the backflow causing dirty water to reverse into your pipes, which can lead to discoloration or a weird flavor. It’s important to call Gibson’s Heating & Plumbing for emergency plumbing services if you notice this, as the contaminated water can be dangerous to consume and may have bacteria or other chemicals in it.

A sudden drop in water pressure can also be a sign of a backflow problem. This can be due to high demand for water in your area, a broken water main, a fire hydrant being opened for fire-fighting purposes, or simply a natural dip in the water pressure. Backflow causes a vacuum effect, which means that if the water is under lower pressure than usual, it will flow backward.

If you have noticed a sudden drop in water pressure, it is important to turn off your backflow assembly. First, shut off the downside shutoff on the backflow preventer, then open both test cocks to ensure that all water supplies are turned off. Then, you can begin to disassemble the backflow assembly and remove any components that need repair or replacement. Once the repair is complete, you can turn your water back on and enjoy your safe, clean water again!

Insulation Contractors

Insulation Contractors Houston specialize in installing insulation for homeowners. They can install different types of insulation, such as fiberglass, cellulose, or spray foam. They can also repair leaky ductwork and hot-water supply pipes.

Insulation

The right professional will help you solve problems like drafts, high energy bills, and uncomfortable rooms. To find the right pro, check his credentials and license.

When choosing an insulation contractor, you want to choose one who is known for providing excellent workmanship and good customer service. A good way to check these qualities is to ask friends and neighbors for references or to search for online reviews. It is also a good idea to look for licensed contractors and ask for proof of insurance coverage, which protects homeowners in the event that any damage is caused during the installation process.

Insulation contractors are experts who specialize in installing insulation and repairing or replacing building materials that stabilize temperatures and soundproof rooms and structures. They are often able to identify problems and make recommendations for repairs that are not obvious to the average homeowner. They are also knowledgeable about vapor retardants, air infiltration, and ventilation, all of which are critical when it comes to insulation.

Homeowners are increasingly choosing insulation contractors to fix issues such as drafty rooms, high energy bills, and frozen pipes. In addition, many people are interested in reducing their carbon footprint. However, figuring out which contractor to select can be a challenging task. Many people use the internet to find a local contractor, but this is not always the best method. In fact, it is better to ask friends and family for referrals, as they have firsthand experience with the contractor in question. Some utilities even provide lists of recommended or approved insulation contractors, which is a great place to start your search.

The insulation contractor industry consists of establishments that install, repair, or replace insulation materials in commercial, industrial, and residential buildings. The primary customers of these businesses are homeowners and builders, although some insulation companies focus on a specific type of building construction.

The growth of the insulation contractor industry is fueled by the need to reduce energy costs and improve building standards. The industry is characterized by low market concentration, as no single operator claims more than 1.0% of industry revenue. 

Experience

An experienced insulation contractor will have worked on many different projects, so they will know what works and what doesn’t. They will also be able to suggest the best type of insulation for your home and ensure that it is properly installed. You can find out how much experience a company has by asking them for references and speaking to their previous clients. You can also check whether they have liability insurance that covers any damage caused by their workers while on your property.

You can ask a potential contractor about the type of insulation they use and why they recommend it. There are a few different types of insulation, and each one has its own advantages and disadvantages. For instance, some types of insulation are flammable while others are not. A good contractor should be able to explain the differences between cellulose, fiberglass, and spray foam insulation and the best place for each one in your home.

When choosing an insulation contractor, you should also look at their pricing structure and if they offer any warranties or guarantees. A reputable contractor will stand by the work they perform and will be willing to give you a written quote. They will also be happy to provide you with a list of satisfied customers and testimonials.

Another important question to ask is whether the insulation contractor has a license to operate in your area. This will help you avoid working with unlicensed contractors, who are often less reputable. Licensing is a necessary requirement to carry out insulation installation and repairs, and it protects both you and the contractor.

The insulation contractor industry consists of companies that install, repair, or replace insulation materials in residential and commercial buildings. These materials can stabilize building temperatures, soundproof rooms, and provide protection from fire. Generally, demand for the industry’s services is closely tied to the level of activity in the construction market. However, the residential housing market is anticipated to cool down in the next five years, reducing overall demand for the industry’s services. This is likely to limit the growth of the industry’s revenue.

License

An insulation installer business is a good fit for people who have experience in the construction industry, are passionate about their craft, and enjoy a customer-focused work environment. They can help commercial and residential buildings reduce energy bills, improve air quality, and increase the comfort and safety of occupants.

To start an insulation contractor business, you should have a minimum of two years of experience in the field and complete a training course or attend a licensing school. This will prepare you for the state exam and ensure that your knowledge of the industry is up-to-date. It is also important to research your potential competitors and identify the services they provide. This will help you identify any gaps in the market and develop a strategy to fill them.

You should also decide how you want to structure your business. The legal structure you choose will affect your taxes, personal liability, and business registration requirements. The most popular option is a limited liability company (LLC), which is simple and fast to register. 

Once you have decided how to structure your business, you should register it with your state’s department of labor. It’s important to do this before starting your business, as it will help you avoid delays and hefty fines later on. Also, it will help you keep your personal and business finances separate, which is essential for avoiding tax confusion.

A license is essential for anyone who wants to do business as an insulation contractor, and it’s easy to obtain one. You can take a licensing class to learn the material and get practice questions before taking the state test. The test is multiple-choice and closed-book, but it’s not as difficult as you might think.

If you’re unsure how to select the right insulation contractor for your home, ask friends and neighbors for recommendations or check out the ICAA website. You can also contact your utility company for a list of licensed contractors. You should always check whether the insulation contractor you’re considering has a current bond before hiring them for your project.

Insurance

Insulation contractors are tradespeople who install, repair, and replace insulation materials in residential or commercial locations. Insulation serves many purposes, including stabilizing building temperatures, soundproofing rooms, and fireproofing buildings. It’s crucial that they have the right insurance coverage to protect themselves from potential risks and liabilities.

An independent insurance agent will work with you to determine your exact business needs. They will help you compare and choose the policies that best meet your budget. They will also help you understand how each policy works and the specifics of the coverage. This will ensure that you are covered in the event of any unexpected events.

One of the most important types of insurance for insulation contractors is commercial general liability. This insurance will pay for most legal claims that involve third-party bodily injury or property damage resulting from the products or services you provide or from your company’s premises. It will also cover your legal fees and any settlement costs.

In addition to this, you should also have commercial property insurance. This will cover the cost of repairing or replacing your equipment if it is damaged in an accident or stolen by thieves. This is a crucial type of insurance for insulation contractors because it will allow them to continue working without incurring significant financial losses.

Workers’ compensation insurance is another essential type of insulation contractor insurance that all businesses should carry. This will cover medical expenses and lost wages for employees who are injured or sick while on the job. This is required by law in most states.

You may also need professional liability insurance to cover you in the event that a customer sues your company for damages caused by your advice or services. This includes lawsuits arising from jobsite modifications, construction management services, and other professional exposures. In addition to this, you should consider transportation pollution liability coverage to protect you from claims arising from the transportation and loading of possible pollutants.

Insurance can be expensive, but it’s worth the investment in order to mitigate your financial risk and protect your business from unforeseeable events. An experienced insurance broker will be able to find you a tailored insulation contractor insurance policy that meets your budget. They can also unlock discounts, compare rates, and explain the process of modifying future policies or filing a claim.

How to Make a Plumbing Repair

Plumbing is an essential part of any home. It’s the means by which water moves through the house, and flushes waste away.

Plumbing

When something goes wrong with your plumbing, it can cause a big mess and a large bill. This is why it’s important to schedule regular plumbing maintenance. For professional help, contact Morristown Plumber.

A leaking pipe can be a serious problem, not only causing water damage in your home but also creating unhealthy conditions for mold and mildew. The best solution is to fix the leak quickly so that the water doesn’t cause further damage or make the situation worse.

Thankfully, there are many ways to stop a leak without having to replace the entire pipe. These DIY methods can be done with items you can find at your local hardware store and will save you money in the long run.

The first step in repairing a leak is to shut off the water supply and any faucets connected to the leaking pipe. This will allow you to dry the area and will help the pipes to dry more quickly.

Next, measure the circumference of the leaking pipe. This will give you the measurements you need to purchase the right repair supplies.

There are a number of different types of repair tape that can be used to fix a leaky pipe. They can be purchased at most hardware stores and can be applied to both metal and plastic pipes.

Fiberglass resin tape works well for temporary repairs intended to slow damage. It uses a water-activated resin that hardens around the pipe, allowing it to create a watertight seal. This method is ideal for small leaks that don’t need immediate attention or for leaks that are too large to be fixed by a DIY homeowner.

Epoxy putty is also an excellent option for repairing a leaky pipe. It comes in both putty and liquid (syringe) forms, which can be applied directly to the leaky pipe or fitting.

This is a very easy way to patch up a hole or crack in a PVC pipe. It’s important to read the instructions and take care to clean the pipe or fitting before applying the epoxy.

Another option is to use a rubber patch. There are a variety of rubber patch kits available for sale at most hardware stores that can be applied to a leaky pipe in minutes.

The key to this type of repair is to make sure the patch is large enough to cover the hole or crack and secure it in place with a hose clamp. This will ensure that the leak will stay sealed until you are able to call a professional plumber for a permanent fix.

Epoxy putty is a handy tool that plumbers use to fix leaking pipes, create watertight seals around faucets and drains, and repair cracked and chipped masonry and concrete. It consists of two compounds, a resin, and a hardener, that have a moldable soft consistency similar to clay.

It can be kneaded to form a solid, strong bond with almost any surface it is applied to. When cured, it can be painted, drilled, sawed, and sealed.

There are many types of epoxy putty, but they all have one thing in common: they are strong and can be used to fix a wide variety of household issues. Some are specifically designed for plumbing repairs, which can be bonded to damp surfaces and cured underwater.

Usually, it comes in a convenient stick format. You simply remove a small amount of the glue from the stick and knead it with your fingers until it is uniform in color. Then, you wrap it around the leak and press down on the edges to secure it.

The chemistry of the hardener determines how quickly it will work with certain materials, so you should choose the best epoxy putty for your needs. 

For larger projects or more intricate work, you may need to take a little longer to get the best results with epoxy putty. You can always choose a more powerful hardener, which will speed up the working time.

It’s important to sand and clean all surfaces you’ll be using the epoxy on before applying it. This will ensure you’re able to create a strong bond and prevent the epoxy from cracking or falling apart.

Some plumbers also use plumber’s putty, which is an old-fashioned gooey substance that is used to make watertight seals around taps and other plumbing parts. It is less messy than Teflon tape and can be used on many different materials, but it’s not as durable as epoxy.

Fiberglass wrap can be used to stop a leak in a pipe and can also be used as a temporary patch until a plumber can make a full repair. This is useful if the pipe is located in a difficult place or if you need to make a repair quickly.

This product is made from high-strength, inorganic glass fibers and bonded with a thermosetting resin. It is designed for use in the construction of ducts and provides thermal and acoustical insulation. 

For pipe repair, the product is typically poured into water and wrapped around the damaged area to create a patch. The tape is then cured and hardened. It can be applied over epoxy putty to give extra protection to the repair.

Ensure that the wrap is well-soaked and has been rubbed thoroughly with water as the product is being used. It is important to work with a pair of latex gloves as this will help to prevent skin irritation and reduce the risk of breathing in uncured material.

Once the product has been in contact with water for at least 1 minute, wrap it around the pipe with a small amount of overlap at each layer of wrapping to achieve maximum adhesion. Start at least 100mm before the affected area and continue to wrap the pipe in one direction until the entire roll of fiberglass repair tape is covered with at least four layers.

Repeat this process until the entire roll of fiberglass tape is complete, and then tape it off. Do not forget to pull slightly at each round of wrapping to ensure that the pipe is well secured.

After the wrap has been completed, spray water onto the pipe wrap and consistently spritz it with water to compress the bubbling resins that have risen to the surface of the product. Finally, wear a pair of latex gloves and continue to spritz the repaired pipe section with water as it is being cured for at least 4 hours (at an ambient temperature of 30degC).

A rubber patch is an easy and inexpensive way to repair a small leak in a PVC pipe. The rubber patches are available in a variety of sizes, shapes, and colors and can be applied directly to the leaking pipe or to the damaged area around the fittings.

The best use for a patch is to prevent a pipe from rupturing and causing water damage in your home. If you’re not comfortable working with the pipes and fittings in your home, then a professional plumber is your best bet for repairing these leaks.

To repair a leaking pipe using a rubber patch, first, determine the location of the leak. This will help you find the right size patch and a pair of hose clamps to attach it.

Using scissors, cut a 1-inch square of neoprene or rubber patch that is a little larger than the size of the hole or split. For large holes or fissures, you might need to purchase a sheet of rubber a little larger than the size of the pipe or a bicycle tube patch. Place the patch over the leaking section of the pipe, center it, and secure it with a pair of hose clamps or a repair clamp that has a rubber gasket on one end.

If a leaking pipe is located in a tight space, such as an attic or crawl space, then it may be difficult to pinpoint the source of the leak. A pressure test or specialized video camera can help you locate the leak and locate the pipe.

Once you’ve identified the leak, clean the area to be repaired and dry it thoroughly. Then, use a syringe-form epoxy patch material or a self-mixing repair epoxy to apply the patch to the damaged area.

Most syringe-form patching products are self-mixing, as the plunger on the tube is depressed by the user to mix the ingredients in the product. Others require a hand-mixing process to produce the putty-like repair material that’s used to cover the leaking area and seal it.

After applying the patch, wait about 15 to 20 minutes for it to harden. Once it has cured, turn on the water supply and check for leaks. If the leak persists, then you need to make a more permanent fix for the problem.

Stucco Repair

Stucco is a great option for homeowners looking to enhance their home’s curb appeal. However, stucco can become damaged over time like any other exterior siding.

Stucco Services

When this happens, you need to know how to repair it. Fortunately, stucco repairs don’t have to be a major undertaking. Stucco Repair Philadelphia can be done quickly and efficiently with the right preparation and tools.

A variety of factors can damage stucco. These include the weather, improper installation and more. Generally, these repairs involve the removal of the damaged areas and the replacement of new stucco material.

The price for stucco repair varies depending on the cause of damage and the amount of work involved. Typically, the cost is 75% of the cost of materials and 25% of the cost of labor.

Hairline cracks in stucco can be repaired with DIY kits, but larger or deeper cracks require the assistance of a professional. These cracks can indicate a bigger issue such as water damage or foundation issues.

The cost to repair a stucco that is stained with black or green stains can range from $30 to $50 per square foot. This is usually due to a combination of water damage and wood rot behind the stain.

Stucco is a durable and versatile material that has been used as an exterior finish for centuries. It can be made from a variety of materials, including lime and Portland cement.

Repairing stucco is a fairly easy task if you use the right materials and follow the manufacturer’s instructions. You can fix cracks or holes in stucco by using a patching material that has acrylic additives that help it respond to changes in surrounding temperature.

Once you have your repair material and are ready to start, it’s important to remove any loose or crumbling stucco before you start applying the material. This is necessary because if you apply the patching material onto broken stucco, it will make the stucco look unsightly.

Inspect your home’s stucco at least annually to spot any cracks or holes that may be developing. If you notice bubbles or blistering paint, contact a stucco professional for advice.

Stucco is an age-old material that’s a great choice for both exterior and interior walls. It’s also resistant to extreme weather conditions and abrasion from harsh elements.

If your stucco is damaged, it can be a good idea to repair the cracks as soon as possible. This will help prevent moisture from seeping behind the wall, which can cause serious damage and even health issues.

In most cases, the cracks can be repaired with a simple patch job. However, in some cases the repair might require more work.

Using a cold chisel and hammer, widen the crack to at least a quarter-inch, then clean it out thoroughly with a wire brush.

Next, remove any old metal mesh or support layers and apply new. First, nail down a layer of grade D building paper, then replace the metal mesh, securing it with nails on top of the building paper.

Stucco is an attractive choice for many homeowners as it provides a protective shell that can keep your home cool, soundproof and save on energy costs. However, the installation process is time-consuming and labor-intensive – not for the DIYer.

It also requires a professional contractor who has the right experience to handle your job properly. This ensures you get a quality finished product that lasts.

If you need to drill into the wall, make sure you use a masonry bit so it doesn’t cut through the sheathing. You’ll also want to take it slow and steady, as you could damage your stucco or sheathing if you don’t know what you’re doing.

Lastly, check the metal mesh underneath the stucco to ensure it’s in good condition before applying your new material. If it’s not, you’ll need to remove it and apply a new piece of mesh. This is an easy task that can save you time and money by avoiding unnecessary repairs in the future.

Stucco repair is the process of fixing damaged or deteriorating stucco surfaces. Stucco is a popular exterior finish for homes and commercial buildings, made by combining cement, sand, and water. Over time, stucco surfaces can become cracked, chipped, or stained due to exposure to weather, moisture, and other environmental factors.

Stucco repair typically involves identifying the cause of the damage, removing any loose or damaged stucco material, and applying a new layer of stucco to the affected area. The repair may involve patching small areas of damage or reapplying stucco to larger sections of the building.

Kinds of Trash Pickup Services

When you’re moving into a new home, it’s important to figure out what trash pickup services are available in your area. Trash pickup can be a hassle, especially if you’re not sure how to set it up correctly. 

Trash Pickup Services

Trash Pickup services are a great way to keep your home clean and tidy. Moreover, they facilitate recycling. However, not all trash removal companies provide the same services. You’ll need to do a little research before hiring a company.

For example, you might want to find out if your city offers different types of trash and recycling pickups. This will help you narrow down your options and make a more informed decision about which provider to hire.

The best way to find out is to ask around and do a bit of research online. You can also try asking for recommendations from friends or family who have already enlisted the help of a waste management company.

Another good option is to contact your local government office and ask for more information on garbage collection. They will usually provide a list of available companies and contact details.

You might also wish to call your HOA to find out if they are responsible for the cost of waste collection service. In some localities, this will be included in the monthly fees you pay to your HOA.

If you live in a larger building or complex, you may also want to consider getting an on-site valet service. This is the best way to ensure that your garbage gets collected on time and efficiently.

The most important thing to remember is that the most efficient waste removal service will vary depending on your location and the type of rubbish you generate. A small home that only produces a modest amount of waste might only require one weekly service, while a large commercial building will probably need multiple pickups per week to accommodate all the refuse it produces.

Commercial customers need to dispose of trash on a regular basis, and having an efficient plan can help them manage their garbage more efficiently. The right waste management company will offer a variety of services to meet their needs, including scheduled curbside pickups and commercial dumpster rentals.

Construction companies, retail businesses, and restaurants all need to store and haul away large amounts of garbage and debris on a regular basis, and dumpster rentals provide the perfect solution. They can help businesses efficiently manage their trash and keep projects on track.

Restaurants, in particular, must adhere to industry standards that require them to be sanitary and clean, so having a waste compactor rental is essential for keeping their establishments that way. This will allow them to efficiently manage dry, wet, and bulk waste on-site until they can schedule a pickup with their trash service provider.

Trash compactors also make it easier for sanitary workers to perform their job, saving them time and making them more productive. They can even be used to dispose of hazardous waste that must be disposed of properly.

Aside from removing garbage, commercial trash removal services can also help businesses recycle. This can save the business money and help the environment.

In the city, they offer trash and recycling services for residential and commercial customers, offering dependable pickups at competitive, stable rates. They also provide green and bulky item pickups, as well as dumpster rentals for large jobs.

In addition to providing trash pickup services for residents and businesses, the city provides a Utility User’s Tax Exemption that allows low-income single-family residential customers to receive a $5 per month discount on their trash and recycling services. To apply for this service, residents should contact the City’s Customer Service Center and fill out an application.

Aside from helping businesses manage their trash more efficiently, utilizing Trash Pickup services can also help them comply with a new City Council rule that requires commercial buildings and facilities to set out garbage containers. This will help reduce the number of rats and other rodents that live in these areas, as well as improve the safety of employees and visitors.

Planning a Kitchen Renovation

A kitchen is the heart of your home. It’s the place where you can spend time with your family and create memories that you will cherish for a lifetime.

Kitchen Remodeling

Kitchen Remodeling Tacoma WA is an excellent way to add value to your home and improve your daily life. But it’s important to plan carefully and set a budget before you start.

The kitchen is a central part of most homes. It is the place where family memories are made, and food is prepared. A well-designed kitchen can reflect a homeowner’s personal taste and lifestyle while also being functional and adaptable to changing needs over time.

A good kitchen layout maximizes storage space, allows efficient use of counter spaces, and creates comfortable seating areas. The design should take into consideration the number of people who will be using the kitchen and the amount of cooking that will be done.

Some of the most common kitchen layouts include an L-shaped, G-shaped, and galley kitchen. These designs are ideal for people who live in small spaces, such as mobile homes or condos. They are also great for college students and young adults living alone.

An L-shaped layout includes a sink and stovetop along two perpendicular walls. This makes it easier for cooks to move around the room and avoid bumping into other people.

G-shaped or peninsula layouts include a sink, stovetop, and counter space on one wall. This design is popular among homeowners who want to add a breakfast bar or additional seating in the kitchen.

The backsplash is another important element of a kitchen remodel. It serves a functional purpose by protecting the walls and countertops from steam, water, and other liquids that are prone to damaging the materials. It can also enhance the look of the kitchen and make it more interesting. A backsplash is usually covered with tile, but it can also be made from other materials, such as stone or concrete.

When you are planning a kitchen remodel, the layout is an important decision. It can help you avoid making mistakes and make the space functional. It also provides guidelines for the design of the new kitchen.

There are many kitchen layout options available to choose from. They are based on different factors, including the size of the kitchen and how you will use it.

For instance, if you have small children and need additional storage, an L-shaped layout might be best for you. It allows you to get the most out of your counter and storage space while still allowing you to walk through it easily.

A U-shaped kitchen is another popular option for homeowners with limited space. It offers the same amount of counter space as an L-shaped kitchen but with more storage options on three sides. This layout works well in kitchens that are more than 10 feet wide.

The galley kitchen layout is a common layout for smaller kitchens with limited spaces. It aligns the sink, refrigerator, and stove against one wall to maximize space.

This kitchen layout can be especially useful in narrower areas, like those found in apartments. However, it can also be difficult to work in, as the elements must be grouped close together.

If you are designing a galley kitchen, it is essential to consider the flow of movement in the kitchen. This is a crucial part of the design process because it can quickly get tiring to move between the sink, refrigerator, and stove.

Other aspects of the kitchen layout include lighting and how you will use the space. Ideally, you should select lighting that is efficient for each task and that will enhance your cooking experience.

The materials used for a kitchen remodel are one of the most important factors to consider. This is because they can make or break the project and can also affect its cost.

The best way to choose the right materials is to plan ahead. This means taking your remodeling budget into account and making sure that you will not exceed it.

Deck Repair: How to Keep Your Deck Looking Great

Decks can be easily damaged by the weather, but a few simple repairs can extend their life and make them look good again.

Deck Repair

Most repairs can be completed by homeowners who have basic carpentry skills, though more extensive repairs, such as repairing damaged wood due to rot or termites, should be left to the pros. Contact Remodel Contractor for professional assistance.

Deck repair costs vary depending on the type of damage, the materials, and the labor rate in your area. Minor repairs such as replacing screws and nails are relatively inexpensive, but termite infestations can be very expensive to fix.

Wood is a common material for decks, but it can be susceptible to insect damage from termites and carpenter bees. This can be a major problem for homeowners, and it’s important to have a pest inspection done before repairing any wood parts.

Fortunately, most decks don’t require extensive work to look good again. A few boards that are broken or missing can be replaced, and railings can also be repaired. However, it is often worth the investment to upgrade to higher-end materials, such as composites or aluminum railings.

Repair costs for cracked or loose decking typically range from $150 to $500. These prices depend on the material, the size of the crack, and how much time it takes to fix it. The larger the crack, the more expensive it will be to repair.

Loose or rotten posts can also cause problems, and replacing them will add an additional $400 to $1,500 to the overall repair cost. These costs will vary depending on the type of post and the number that need to be replaced.

Another major cost associated with a deck is the yearly maintenance it requires. This can include cleaning, staining, and sealing the deck to prevent rot, water damage, and other issues.

If the deck is deteriorating, you may need to replace damaged boards or the entire deck. This can be very expensive, though, so it’s wise to consider all of your options before making a decision.

The size of the deck also plays a role in the cost. Decks with more square footage generally cost more to repair than smaller ones.

Decks with a slope or uneven terrain may need repair or even replacement. This can be a costly project, especially if the ground under the deck is sinking.

If you’re looking to make your deck a little more stylish, a skirting can help hide the uneven terrain and match the style of the rest of your home. This can be an inexpensive way to update your deck, but it does require additional time and materials, as well as a professional to complete the job.

The materials you use for your deck can make a huge difference in the amount of repair and maintenance it needs over time. Some materials are more difficult to work with and require more maintenance than others, but all will require repairs over the years.

Wood and composite materials are popular choices for decks, and both have their pros and cons. For example, composite material can be more expensive than natural wood, but it requires less maintenance and can be easier to install. However, it is susceptible to rotting and cracking, which can result in more repair needs.

Regardless of the type of material used for your deck, it is important to inspect it regularly to catch any problems before they get worse. This will prevent further damage and keep you from spending unnecessary money on repairs.

If you have a deck that is not structurally sound, it is advisable to contact a professional as soon as possible. They will be able to spot any problems that may have gone undetected.

A professional can also check for any hidden problems, such as termites or mold growth. These can cause serious damage to your deck if left untreated.

Once you have identified the issue, gather the tools and materials needed for a repair. You may need to replace a section of decking or add railings or steps to the affected area.

Home Remodeling: Make Your Home More Enjoyable and Increase Your Home’s Resale Value

Home remodeling is a great way to improve your home and make it more comfortable for you. It can also increase your home’s resale value.

Home Remodeling

Whether you’re planning to do the remodeling yourself or hire professionals, there are several essential tips you need to know. Here are some tips at https://jrcsi.com/.

Home remodeling is a great way to improve your home and make it more enjoyable. It can even increase your home’s value if you decide to sell it in the future.

A home remodel is any renovation that completely changes the layout, structure, or style of a room. This includes things like combining two rooms to create a more open-concept living space, adding a kitchen island, or renovating the entire kitchen.

The key to making a home remodeling project worth it is to choose projects that will add to the value of your property. For example, a new roof or rewiring are both excellent ways to boost your home’s resale value.

Other home improvement projects can also add to your property’s value, such as updating your bathroom or installing energy-efficient features. These upgrades will help lower your utility bills and give you a more attractive selling point when it’s time to move.

You can also increase your home’s resale worth by repairing any major structural issues with your home. These problems can include a faulty roof, termite infestation, or outdated electrical systems.

In addition, you can also upgrade your home’s plumbing, heating, and cooling systems. These upgrades will improve your home’s energy efficiency and can reduce your costs for gas, electricity, and water utilities while you live in the house.

Finally, if you’re a renter or owner-occupied, home improvement can make your home more comfortable for you and your family to live in. Many of these changes can improve your health by reducing airborne allergens and moisture. This can help with allergies and asthma symptoms. It can also help you avoid a host of other ailments, such as respiratory infections, coughing, sneezing, runny noses, sore throats, and red and tired eyes.

If you’re thinking of making your home more efficient, there are many ways to go about it. From changing light bulbs to upgrading your appliances, there are plenty of simple things that you can do to make your home more energy-efficient.

First and foremost, it’s important to think about your home’s size and shape. Generally, bigger homes require more materials to build, which means they’re going to use more energy to heat and cool. A smaller house, on the other hand, is going to require less raw materials and therefore use a lot less energy.

Another way to make your home more energy efficient is by improving its insulation. This is a very important step to take, as it can reduce your energy costs by up to 50%.

Adding insulation to your home will help it retain the temperature you set and make it more comfortable. It can also reduce your heating and cooling costs by up to 8%.

Next, you can consider choosing energy-efficient appliances when it comes time to replace yours. For example, a front-loading washing machine uses less water and can save you money on your utility bills over time.

Finally, if you’re considering switching out your fridge and freezer, choose a model that’s top-mounted, as this will save you 20 to 25 percent in energy usage.

You can also opt for Energy Star-rated appliances to ensure you’re using the most efficient options available on the market. If you’re unsure about which to buy, ask around and read reviews from other homeowners. There are a lot of great options out there that will save you money in the long run, so it’s well worth your time and effort!

The design of your home can have a huge impact on how comfortable you feel. If your home is cluttered or cramped, it can be difficult to relax and enjoy living in it. Changing the layout of your home can make it feel more spacious and open.

Another way that remodeling can make your home more comfortable is by adding extra insulation and creating new openings to let natural light in. This can help keep your home warmer in the winter and cooler in the summer. This will make you more comfortable in the long run and can save you money on your energy bills.

What You Should Learn About Bathroom Renovation

Bathroom renovation is a home improvement project that involves significant changes to a bathroom’s layout and appearance. These modifications include fixture replacement, rewiring, and plumbing.

Bathroom Remodeling

However, these changes can be significant and expensive. That’s why some homeowners wonder if they should remodel at all.

Whether you’re planning to remodel your bathroom or simply update its look, it is important to choose fixtures that are functional and stylish. The right fixtures can transform a bathroom into a luxurious space while also increasing the home’s value.

Modern bathrooms have a wide range of fixture options, from glass sinks to porcelain toilets. Some of the most popular choices include brushed nickel, bronze, and brass finishes.

These finishes are often a good choice for contemporary or industrial bathrooms and can help define the room’s overall style. However, be sure to choose a finish that is durable and easy to maintain.

There are also several new fixture innovations that can save energy and money, such as tankless water heaters, LED lighting, and low-flow faucets and showerheads. These products are a great way to make your bathroom more environmentally friendly while still maintaining the functionality and quality you want.

Before selecting your bathroom fixtures, consider the room’s layout, natural light source, and priorities. These factors can influence what type of fixtures are best suited for your bathroom and how much they should cost.

Once you have a list of the fixtures that are required, take measurements and create a budget that includes materials and labor. Then, visit a showroom and talk to the design team about your needs.

Another great resource for finding the perfect fixtures is a home improvement magazine. Many magazines have pictures of bathroom fixtures that are both stylish and functional, so you can get a feel for the options available.

Then, keep the images in a file to use when you go shopping for fixtures. This will allow you to remember the images when you’re in the store and make well-rounded decisions.

The bathroom is a room that requires frequent attention to detail and cleaning, so choosing fixtures that are easy to clean and maintain can be especially important. The right fixtures will last for years to come and keep your bathroom looking its best.

Whether you’re remodelling your current bathroom or starting from scratch, the layout of your new space can have an impact on how your bath looks and feels. Getting the right arrangement for your needs can be a challenge, but with some clever bathroom layout ideas, you can maximize your space and create a beautiful bathroom that suits your lifestyle.

One of the most important decisions in your bathroom remodel will be where to put your sink, toilet, and tub/shower. The placement of these key elements will help your space feel organized and livable.

For a more compact layout, consider placing the sink and toilet in the same room but with a door that leads to another room. This approach is great for people who want a bathroom that can accommodate more than one person at a time and can handle a guest shower when needed.

If you have a small space, consider using wall-hung units and fittings to free up floor space for other elements. These space-saving options can make your bathroom look more open and airy, particularly if you choose units with sleek or narrow legs.

Another smart layout option is to add a separate space for seating in the bathroom, particularly if you’re looking for master bathroom ideas or want to create an oasis in your space. This can be a great solution if you need an extra place to sit while you’re getting ready in the morning or after a long day at work.

It’s also a good idea to build a closet or linen storage area during the planning stages of your project. These spaces can be used to store towels, shampoo, conditioner, and other essentials.

When you’re designing your bathroom, don’t forget to think about how the layout of your fixtures will affect lighting. Having proper lighting will not only enhance the functionality of your space but also make it more appealing to potential buyers.

Once you’ve determined the best location for your bathroom fixtures, the next step is to decide on a design. Having a clear idea of what you’re looking for will make the design process much easier. It’ll also allow you to set a budget and hire contractors.